This is just a short demonstration on uploading a photograph, previewing the photo, and then emailing the photo to a user defined email address.
I will use the Perl, Dancer2 a lightweight web application framework, Template Toolkit, and Bootstrap.
You can set up Gmail or Hotmail to act as your mail server. See here or here for useful guides on setting up sSMTP on your linux laptop.
Configuration:
First, set up the Dancer2 configuration file. The original Dancer comes with a helper script which will set up libraries, config files etc. I used this and converted what I needed to Dancer2(All is explained here. I prefer Config::General format to YMAL so I changed the config file to Config::General format and the file suffix from “.yml” to “.conf”.
Main Configuration File.
This config file, written in Config::General format, provides the application with the main view layout( or “wrapper” ) name, “main.tt”. It also notifies the application that we intend to use Template::Toolkit for our views as opposed to the Dancer2::Template::Simple. I specify that the Template will use “[%” style tags as opposed to the Dancer default of “<%” tags. This may no longer be necessary with Dancer2.
We also include UTF-8 encoding for good measure.
1 2 3 4 5 6 7 8 9 10 | appname = "PhotoUp"layout = "main"charset = "UTF-8"<engines> <template_toolkit> ENCODING = utf8 start_tag = '[%' end_tag = '%]' </template_toolkit></engines> |
Development Configuration File
Most of this, except the Input File and Email sections are set up automatically for you using the Dancer helper script. I changed the logging to output to a file (logs/development.log). I also added some configuration for sending the email via sSMTP.
The input file max size and other information can be specified here too. The more constraints that are added here, the less hard coding of data will be needed in the Perl Module.
1 2 3 4 5 6 7 8 9 10 11 12 13 14 15 16 17 18 19 20 21 22 23 | logger = "file"log = "debug"warnings = 1show_errors = 1<InputFile> max_file_size = 1000000 # Kbs file_suffix = .jpeg</InputFile><Email> transport = SMTP-TLS <SMP-TLS> host = smtp.live.com # hotmail username = xxxxxxxn@xxxxxxxxx.com password = "password" port = 587 </SMP-TLS> from = xxxxxxxxxxxx@hotmail.com to = xxxxxx@xxxxxxxxx.com cc = xxx@xxxxxxxx.com subject = Here are your photos. signed = The Boss</Email> |
Views:
I use Template Toolkit for my templating. Dancer2 uses a “layout” as a type of wrapper for your template. Here is mine located at views/layouts/main.tt.
Layout.
1 2 3 4 5 6 7 8 9 10 11 12 13 14 15 16 17 18 19 20 21 22 23 | <!DOCTYPE html><html lang="en"> <meta charset="utf-8"><head>[% title %]<meta name="viewport" content="width=device-width, initial-scale=1.0" /><meta name="description" content="Photo Sender" /><meta name="author" content="austin kenny" /> <!-- Bootstrap File Upload CSS --> <link href="[% request.uri_base %]/css/bootstrap/bootstrap.css" rel="stylesheet" /> <link href="[% request.uri_base %]/css/bootstrap/bootstrap-responsive.css" rel="stylesheet" /> <link href="[% request.uri_base %]/css/bootstrap/bootstrap-fileupload.css" rel="stylesheet" /> </head><body> [% content %]<div class="text-center" id="footer"> <small> Powered by <a href="http://perl.org/">Perl</a> <a href="https://metacpan.org/module/Dancer2">Dancer2</a> <a href="http://jasny.github.io/bootstrap/index.html">Bootstrap</a> </small></div></body><!-- Grab Google CDN's jQuery. fall back to local if necessary --><script type="text/javascript" src="//ajax.googleapis.com/ajax/libs/jquery/1.9.1/jquery.min.js"></script><script type="text/javascript">// <![CDATA[!window.jQuery && document.write('<script type="text/javascript" src="[% request.uri_base %]/javascripts/jquery.js"><\/script>')// ]]></script><!-- Bootstrap File Upload Js --><script type="text/javascript" src="[% request.uri_base %]/javascripts/bootstrap-fileupload.js"></script> |
I have included all the Bootstrap CSS links along with the Bootstrap JavaScript to provide the fancy photo/image preview etc. It is also necessary to provide links to JQuery in order for the Bootstrap code to work. Notice the [% content %] placeholder on line 14. This is where the page specific content(photo_upload.tt) goes.
Upload Page View.
This template view (photo_upload.tt), it the first page that is rendered when the application is called.It contains the “Browse” button for searching for the file/image to be uploaded on the client’s device. It also has an email to field, along with the necessary send button.
Most of the initial heavy lifting will be done by the jQuery upload and preview script, provided by Twitter Bootstrap. When the file/image is previewed, it can be emailed, or the user can opt to discard it in favour of another file/image.
1 2 3 4 5 6 7 8 9 10 11 12 13 14 15 16 17 18 19 20 21 22 23 24 25 26 27 28 29 30 31 32 33 34 35 36 37 38 39 40 41 42 43 44 45 46 | <div class="container"> <!-- Browse and upload file form: --> <form class="form-file-upload file-upload " enctype="multipart/form-data" name="photoUploadForm" action="/photo_upload" method="POST"> <fieldset> <legend class="form-file-upload-heading">Email Your Photos</legend> <!-- Start Bootstrap Template --> <div class="fileupload fileupload-new" data-provides="fileupload"> <div class="fileupload-new thumbnail" style="width: 200px; height: 150px;"> <img src="http://www.placehold.it/200x150/EFEFEF/AAAAAA&text=no+image" /> </div> <div class="fileupload-preview fileupload-exists thumbnail" style="max-width: 200px; max-height: 150px; line-height: 20px;"> </div> <div> <span class="btn btn-file"><span class="fileupload-new">Select image</span> <span class="fileupload-exists">Change</span> <input type="file" name="inPhoto"/> </span> <a href="in_photo" class="btn fileupload-exists" data-dismiss="fileupload">Remove</a> <span class="text-error">[%- upload_error -%]</span> </div> </div> <!-- End Bootstrap Template --> <div class="input-append"> <!-- Mail-to Email address --> <input class="input-large" type="email" name="emailTo" placeholder="Email to" maxlength="60" /> <button class="btn btn" type="submit" >Email Photo</button> </div> <div> <span class="text-error">[%- email_error -%]</span> </div> </fieldset> </form> <!-- <div id="progress"></div> --> <div id="messages"> <p class="text-success">[%- success_message -%]</p> <p class="text-info">[%- info_message -%]</p> <p class="text-warning">[%- warning_message -%]</p> <p class="text-error">[%- error_message -%]</p> </div></div> <!-- /container --> |
Most of this comes straight from the Jasny Bootstrap documentation.
Now it is just a matter of writing the Dancer2 script.
Dancer2 Module
1 2 3 4 5 6 7 8 9 10 11 12 13 14 15 16 17 18 19 20 21 22 23 24 25 26 27 28 29 | package PhotoUp;# ABSTRACT: Upload and email photo(s) demo using ssmpt and Hotmailuse Dancer2;use Dancer2::Core::Error;our $VERSION = '0.1';use Data::Dump qw/dump/;use Carp qw/croak/;use Try::Tiny;use IO::All;use File::LibMagic;#------Emailuse Email::Valid;use Email::Sender::Simple qw(sendmail);use MIME::Entity;use Email::Sender::Transport::SMTP::TLS;#------ Globalsmy $file_upload_route = '/photo_upload';my $uploaded_file = 'inPhoto';my $email_to = 'emailTo';my $image_file_suffix_rx = qr/\.(gif|png|jpe?g)$/;my $image_file_type_rx = qr/image\/(jpeg|gif|png)/;=head2 get $file_upload_route Render the file upload form.=cut |
The first part of the module took care of incorporating all the necessary modules, frameworks and package “global” variables. The most important modules being Dancer2 and Template modules.
The next method is the “GET” ‘/photo_upload’ route method. It will render the photo/image upload page with the image viewer. As you can see, there if very little coding here. Just specifying the template file and in this case, populating one template parameter, the page “title”. Dancer takes care of the rest.
31 32 33 34 35 36 | get $file_upload_route => sub { debug 'Got to GET photo_upload page'; #------ Render the upload page. template 'photo_upload.tt', { title => 'Upload Photos', };}; |
The next method uses the same HTTP route, this time using “POST”. It is called after the file has been uploaded and the ‘Email Photo’ button has been clicked. This method takes care of passing the input parameters(uploaded file object and email address) to a validation method. The CPAN module Email::Valid is used to validate the email address while File::LibMagic has the necessary power to validate the uploaded image. From here, the Email Message building and sending methods are called. And finally, a results page is rendered with the details as to the success or failure of the operation.
37 38 39 40 41 42 43 44 45 46 47 48 49 50 51 52 53 54 55 56 57 58 59 60 61 62 63 64 65 66 67 68 69 70 71 72 73 74 75 76 77 78 79 80 81 82 83 84 85 86 87 88 89 90 91 92 93 94 95 96 97 98 99 100 101 102 103 104 105 106 | =head2 post $file_upload_route Upload the photograph or image file. Will accept files of type .jpg, .jpeg, .png, .gif. Validates the file type and size. Will email them to the user provided email address.=cutpost $file_upload_route => sub { debug 'Got to POST photo_upload page'; debug "Params are : " . dump( request->params ); my $validation_results = { in_photo => upload($uploaded_file) // undef, email_to => params->{$email_to}, }; _validate_user_input($validation_results); debug 'These are the validation results: ' . dump($validation_results); #------ Display errors if ( ( exists $validation_results->{email_error} ) or ( exists $validation_results->{upload_error} ) ) { debug 'Got to display some Errors.'; return template 'photo_upload.tt', { title => 'Upload Photo Errors', %$validation_results, warning_message => 'You must upload the file again and enter a correct email address!', }; } debug 'Good, passed the error checks.'; my $in_photo = $validation_results->{in_photo}; #------ Rename the Base of the temporary file to the original File Base my $photo_fq_name = _rename_uploaded_file($in_photo); my $message = _build_email_message( { email_to => $validation_results->{email_to}, type => $in_photo->type, path => $photo_fq_name, encoding => 'base64', } ); return _process_error('Unable to build MIME::Entity') unless $message; my $transport = _build_email_transport(); return _process_error('Unable to build Email transport!') unless $transport; _send_email_msg( $message, $transport ); template 'photo_sent.tt', { title => 'Emailed Photos', sent_files_heading => 'Emailed Photo(s)', success_message => $in_photo->basename . ' was emailed to ' . $validation_results->{email_to}, in_photos => [$in_photo], have_photos => ( $in_photo ? 1 : 0 ), return_to => uri_for($file_upload_route), };}; |
The input validation method using Email::Valid and File::Lib::Magic to do the heavy lifting here.
107 108 109 110 111 112 113 114 115 116 117 118 119 120 121 122 123 124 125 126 127 128 129 130 131 132 133 134 135 136 137 138 139 140 141 142 143 144 145 146 147 148 149 150 151 152 153 154 155 156 157 158 159 160 161 162 163 164 165 166 167 168 169 170 171 172 173 174 175 176 177 178 179 180 181 182 183 184 185 186 187 188 189 190 191 192 193 | =head _validate_user_input Validate the uploaded file and the 'to' Email address. Pass a HashRef with the Dancer Request Upload Object and the email address. Populates the HashRef with validation information. { in_photo => # the Dancer Request Upload object or not exists email_to => email@emails.com or not exists if invalid upload_error => 'Error Msg....' or not exists if ok email_error => 'Error Msg....' or not exists if ok }=cutsub _validate_user_input { my $validation_report = shift; if ( defined $validation_report->{in_photo} ) { debug 'At least there is a file uploaded.'; #------ Check that the file is a valid Image or Photo $validation_report->{upload_error} = 'Not a valid photo or image type!' unless _validate_file( $validation_report->{in_photo} ); } else { $validation_report->{upload_error} = 'No photo uploaded!'; } #------ Validate the 'to' Email Address $validation_report->{email_error} = 'Invalid or no email address entered!' unless ( $validation_report->{email_to} = _validate_email_address( $validation_report->{email_to} ) );}=head2 _validate_email_address Validates a given Email Address. Uses Email::Valid Returns undef if not valid.=cutsub _validate_email_address { my $email_address_in = shift; my $valid_email_addr; try { $valid_email_addr = Email::Valid->address($email_address_in); } catch { error 'Problems with Email::Valid!: ' . $_; }; return $valid_email_addr;}=head2 _validate_file Validate the file type by first checking the file suffix, then validating the file type with File::Lib::Magic Also checks that the file is smaller than the maximum allowed size from the config file. Returns the validated file or undef.=cutsub _validate_file { my $in_file = shift; return unless ( $in_file && ( lc( $in_file->basename ) =~ /$image_file_suffix_rx/ ) && ( $in_file->size <= config->{InputFile}{max_file_size} ) ); my $FileMagic; try { $FileMagic = File::LibMagic->new(); } catch { error $_; }; return $in_file if ( $FileMagic->checktype_filename( $in_file->tempname ) =~ /$image_file_type_rx/ );}=head2 _rename_uploaded_file Renames the temporary file basename back to its original name.=cutsub _rename_uploaded_file { my $file_upload = shift; my $io_photo = io( $file_upload->tempname ); my $filepath = $io_photo->filepath; return $io_photo->rename( $filepath . $file_upload->basename );} |
The Email Message is build using various CPAN modules.
MIME::Entity; # To build the Email Message
Email::Sender::Transport::SMTP::TLS; # To set up the Email transport
Email::Sender::Simple qw(sendmail); # Sends the Email
You can check out their documentation on meta::cpan if you are not already familiar with them.
194 195 196 197 198 199 200 201 202 203 204 205 206 207 208 209 210 211 212 213 214 215 216 217 218 219 220 221 222 223 224 225 226 227 228 229 230 231 232 233 234 235 236 237 238 239 240 241 242 243 244 245 246 247 248 249 250 251 252 253 254 255 256 257 258 259 260 261 262 263 264 265 266 267 268 269 270 271 272 273 274 275 276 277 278 279 280 281 282 283 284 285 286 287 | =head2 _build_email_message Build the Email message Uses data from the config file to populate most of these fields.=cutsub _build_email_message { my $in_photo_details = shift; my $data_message = 'Files are attached!'; #----- Follow this link for mime-types-list # http://www.freeformatter.com/mime-types-list.html my %headers = ( type => "multipart/mixed", From => config->{'Email'}{from}, To => $in_photo_details->{email_to}, Subject => config->{'Email'}{subject} // 'Here is your photo', ); my $message = try { MIME::Entity->build( Charset => 'utf-8', Encoding => 'quoted-printable', %headers, Data => $data_message, ); } catch { error 'Unable to build MIME::Entity! ' . $_; undef; }; return unless $message; #--- Attach the photo $message->attach( Disposition => "attachment", type => $in_photo_details->{type}, Path => $in_photo_details->{path}, Encoding => $in_photo_details->{encoding} ) if $message; return $message;}=head2 _build_email_transport Build the Email Transport. Config file specifies SMTP-TLS for this project. My laptop is configured to use sSmtp. My development configuration file has set smtp.live.com(hotmail) as the Email host for convenience.=cutsub _build_email_transport { my $transport; my $error_msg; if ( config->{Email}{transport} eq q/SMTP-TLS/ ) { $transport = try { Email::Sender::Transport::SMTP::TLS->new( host => config->{'Email'}{'SMTP-TLS'}{host}, port => config->{'Email'}{'SMTP-TLS'}{port}, username => config->{'Email'}{'SMTP-TLS'}{username}, password => config->{'Email'}{'SMTP-TLS'}{password} ); } catch { error 'Unable to create a transport method! ' . $_; undef; }; } else { error"No Email transport method specified.\n Did you plan to hand deliver it?"; } return $transport;}=head2 _send_email_msg Send the Email with the photo attached Pass the message and the transport.=cutsub _send_email_msg { my $message = shift; my $transport = shift; try { sendmail( $message, { transport => $transport } ); } catch { error 'Unable to email the files!' . $_; };} |
And then there is the Error processing. Just in case …….
288 289 290 291 292 293 294 295 296 297 298 299 300 301 302 303 304 305 306 307 308 309 310 311 312 313 314 315 316 317 318 319 320 321 322 323 | #-------------------------------------------------------------------------------# Render Error Page# Pass a message and a URL to return to.#-------------------------------------------------------------------------------sub _process_error { my $error_msg = shift // 'Something really bad must have happened.'; error $error_msg; return Dancer2::Core::Error->new( response => response(), status => 500, message => $error_msg, )->throw;}#-------------------------------------------------------------------------------1__END__=pod =head1 NAME PhotoUp - Upload and Email Photo(s) Demo =head1 VERSION version 0.1 =head1 SYNOPSIS Just a demo. =head1 DESCRIPTION This is just a short demo to Upload a use inputted photograph or image. The photo will be emailed to a user inputted email address using Dancer2. It will take advantage or Bootstrap's photo upload and preview JavaScript/jQuery component. It will also use Template::Toolkit.=cut |
This pretty much takes care of uploading the photograph, validating that it is in fact a photo or some other image type and validating the ‘to’ email address. It also checks to make sure that the file is not larger than the maximum size specified in the configuration file. It then emails the photo to the requested email address. Along the way it also logs some debug and error messages. If everything runs as planned, a page will be rendered notifying the user of the operations success.
Views (cont):
Display the results of our actions in photo_sent.tt.
This is the final template view rendered. Only a few things to note here for those of you who are not familiar with Template::Toolkit. Template::Toolkit allows lots of data processing and manipulation. It has many Plugins that can be installed to filter data or to use various CPAN modules like DateTime.pm right inside the template.
I just use a little manipulation of the uploaded file size data so as to figure out the best way to represent the size units of the file. I also threw in some error and status message fields at the foot of the view, which I haven’t fully utilized yet.
1 2 3 4 5 6 7 8 9 10 11 12 13 14 15 16 17 18 19 20 21 22 23 24 25 26 27 28 29 30 31 32 33 34 35 36 37 38 39 40 41 42 43 44 45 46 47 48 | [% USE two_dec = format('%.2f') -%]<div class="container"><!-- Sent Photos Form --> <p class="lead">[%- sent_files_heading -%] </p> <table class="table table-hover"> <thead> <tr> <th>File Name</th> <th>Type</th> <th>Size</th> </tr> </thead> [% FOREACH file IN in_photos %] <tbody><tr> <td>[%- file.basename -%]</td> <td>[%- file.type -%]</td> [%# 'Display the size in most appropriate unit size.' %] [% IF file.size < 1024 %] <td> [% file.size _ "Bytes" %] </td> [% ELSIF file.size < 1048576 %] <td> [% two_dec(file.size / 1024) _ 'K' %] </td> [% ELSIF file.size < 1073741824 %] <td> [% two_dec(file.size / 1048576 ) _ 'M' %] </td> [% ELSE %] <td> [% two_dec(file.size / 1073741824 ) _ 'G' %] </td> [% END %] </tr></tbody> </table> [% END %] <a href="[% return_to %]"> <button class="btn btn-large" >Back</button></a> <div id="messages"> <p class="text-success">[%- success_message -%]</p> <p class="text-info">[%- info_message -%]</p> <p class="text-warning">[%- warning_message -%]</p> <p class="text-error">[%- error_message -%]</p> </div></div> <!-- /container --> |
Sample Web Pages
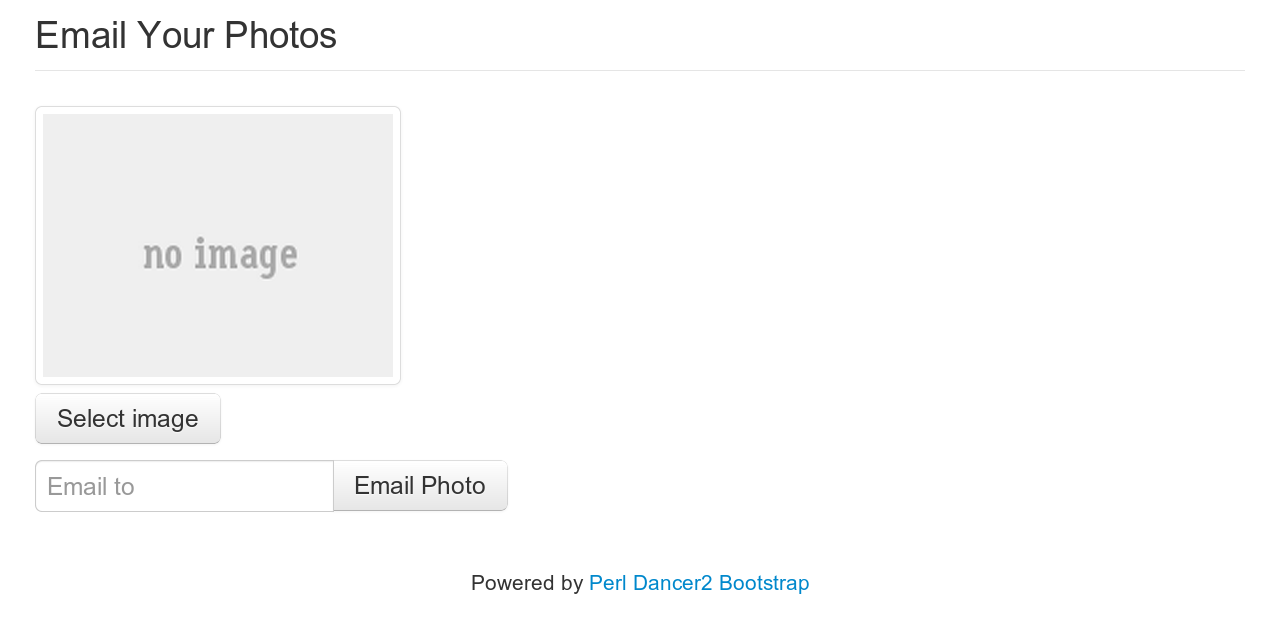
Photo Upload Page
This is the initial photo upload page.
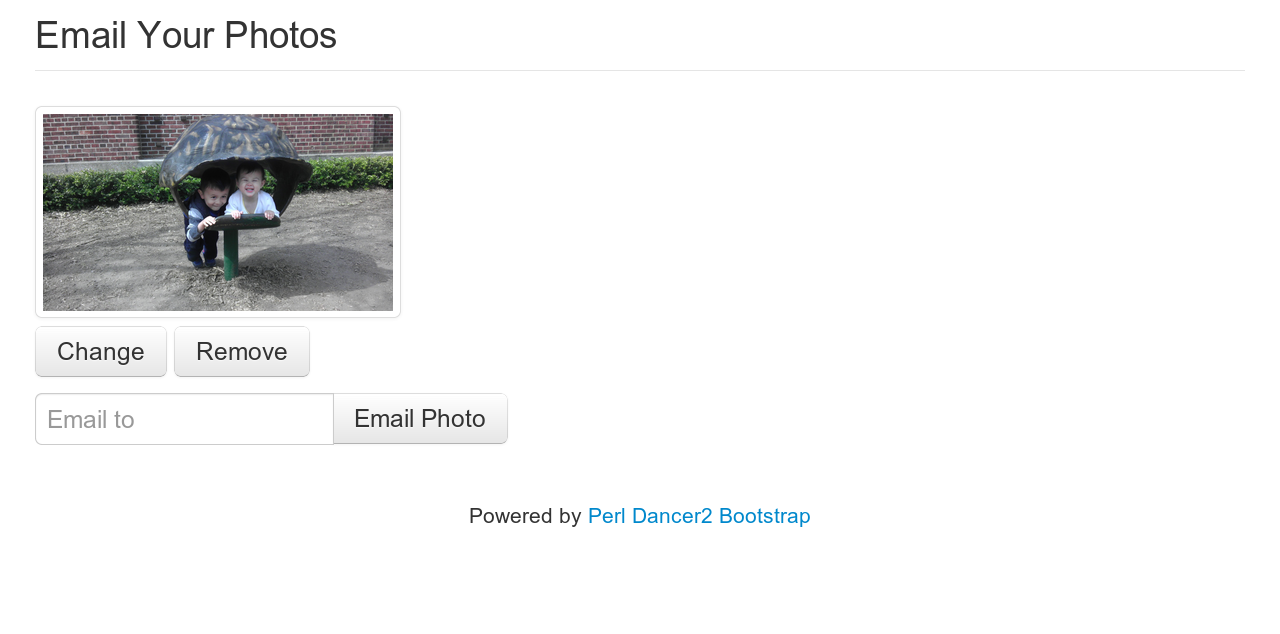
View Uploaded Photo
This is what the web page looks like when a the photograph has been uploaded.
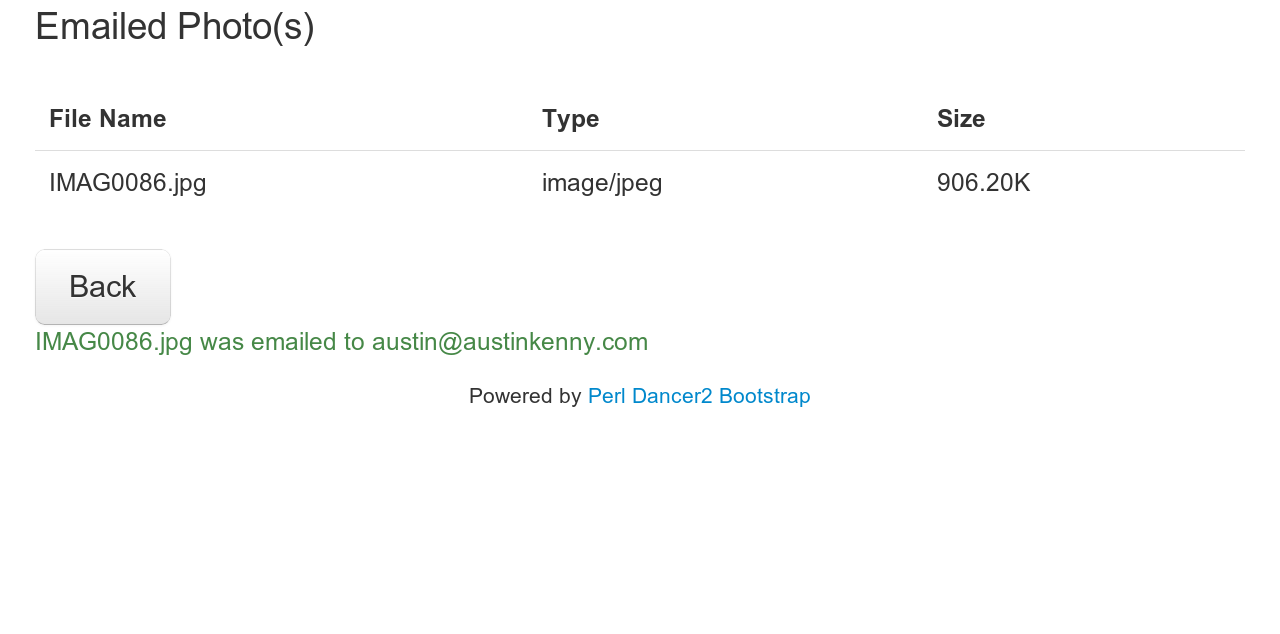
Results Page
This page is displayed after the photo is emailed.
Todo
Ok, thats it for this one for now. There are a few other things that I could do here. Test scripts need to be setup to really test this one out. Also I could add some more client side validation to the existing validation provided by Bootstrap. I have used this in the past and found it a very useful client side validation library. Also I plan to check out this more elaborate jQuery file upload library in the future.
Summary
Dancer2 provides a nice framework for building small to medium sized Web based applications. It is not as powerful, or as well documented as Catalyst. On the other hand, the learning curve is somewhat less steep than Catalyst. I still think that Catalyst is a much better framework, but I do plan to use Dancer2 for some more small applications. Plack::Builder is also another option worth checking out for very small web apps.
The code for this can be found in my GitHub Repo.